 PawStyle Daily
DIY Cat Tree & Pet Crafts
5 DIY Cardboard Cat Castles From Boxes (Free Plans)
Shipping boxes become castles in one afternoon: cut doors, stack towers, add a tunnel. Five plans from single-box starter to triple tower, and every one lists the steps, the build time and the supervision rule for a box a cat can chew on. For informational purposes, consult your vet.
By PawStyle Daily · Updated 21 October 2026
Good to know: 1-3 hours each · Boxes + tape + box cutter · Remove staples and plastic; supervise chewing.
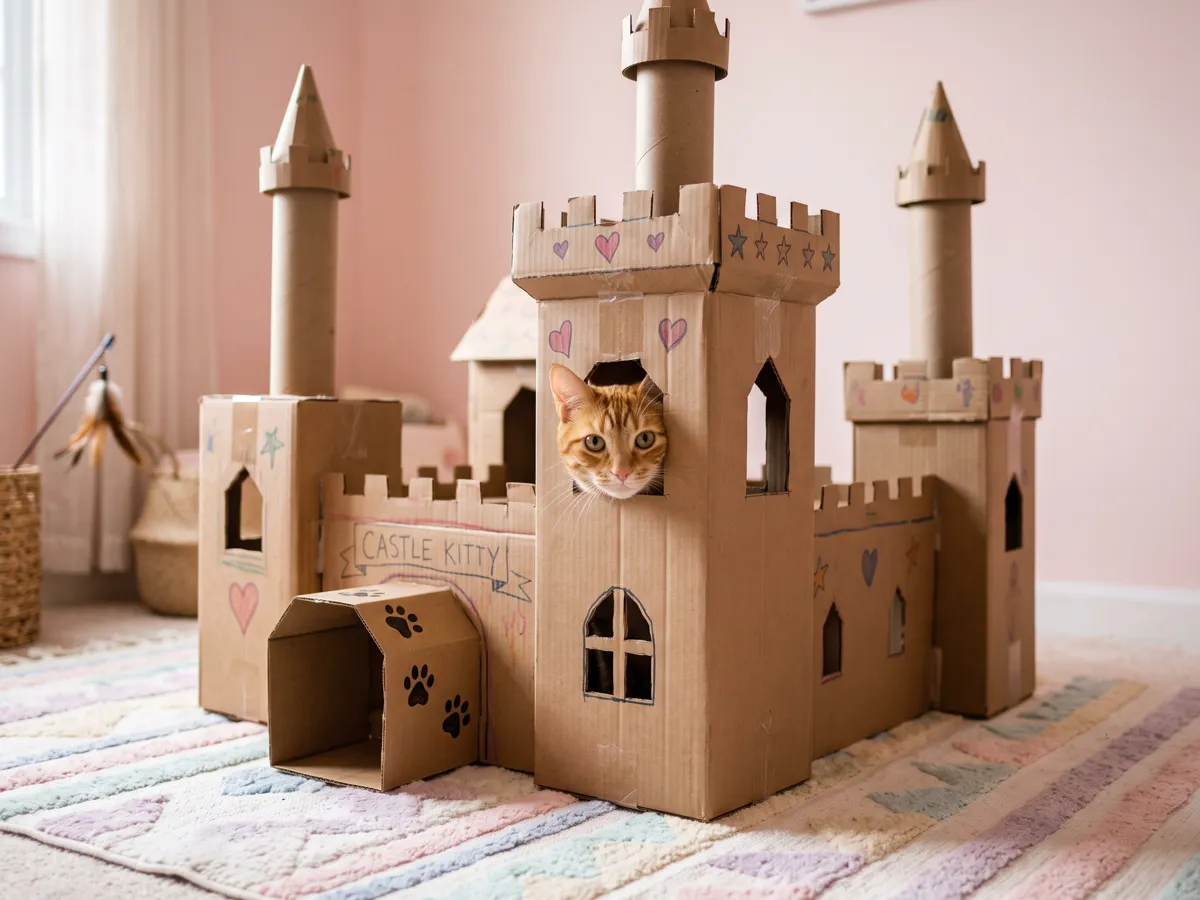
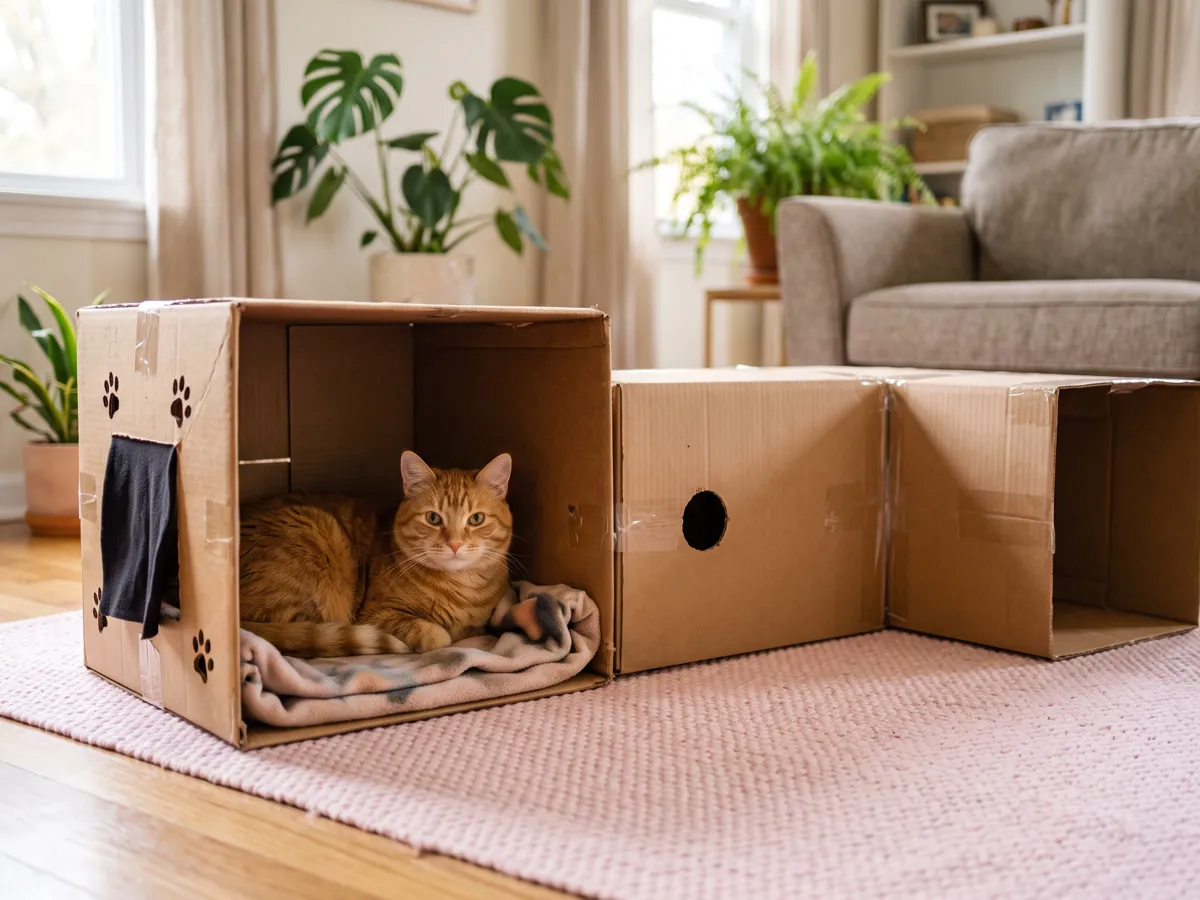
1-2. Starter: single-box den, double-box tunnel
One box with two door cutouts becomes a den: add a blanket and done. Two boxes taped end to end become a tunnel with a peek hole in the middle. Build time: about 30 minutes each. The easiest first build, and a covered spot a cat can sit inside.
Beginner · Build time about 30 minutes · Doors 6 inches wide; sand cut edges smooth.
3-4. Towers: stacked duplex, corner keep
Stack two boxes with offset doors for a duplex, or set three boxes in an L-shape for a corner keep that fits a small apartment. Glue sisal scraps beside one door per tower: scratching areas can be a sisal-covered surface on an elevated perch or a scratching pad, and key resources should be available in multiple locations. Top the tallest tower with a folded blanket. An ideal perch is elevated, with a padded cover, and an elevated area gives a cat vertical space to monitor its environment.
Intermediate · Build time about 1-3 hours · Hot glue + tape; weight-test every level before cats enter.
To style the wall around a corner keep, see our 300sqft cat corner ideas for the perch and shelf side of the same room.
5. Weekend palace: triple tower with bridge
Three towers linked by a cardboard bridge plank, windows cut high for a view out. The showpiece build, about 3 hours over one weekend. Retire chewed panels monthly; castles are consumables, not furniture. For kittens and older cats with limited mobility, keep boxes, perches and shelves low or reachable by a ramp.
Weekend · Build time about 3 hours · Replace chewed panels; never let cats eat tape or glue.
For the litter side of the same small floor plan, see our hidden litter box layouts for a small apartment and keep the build corner clear.
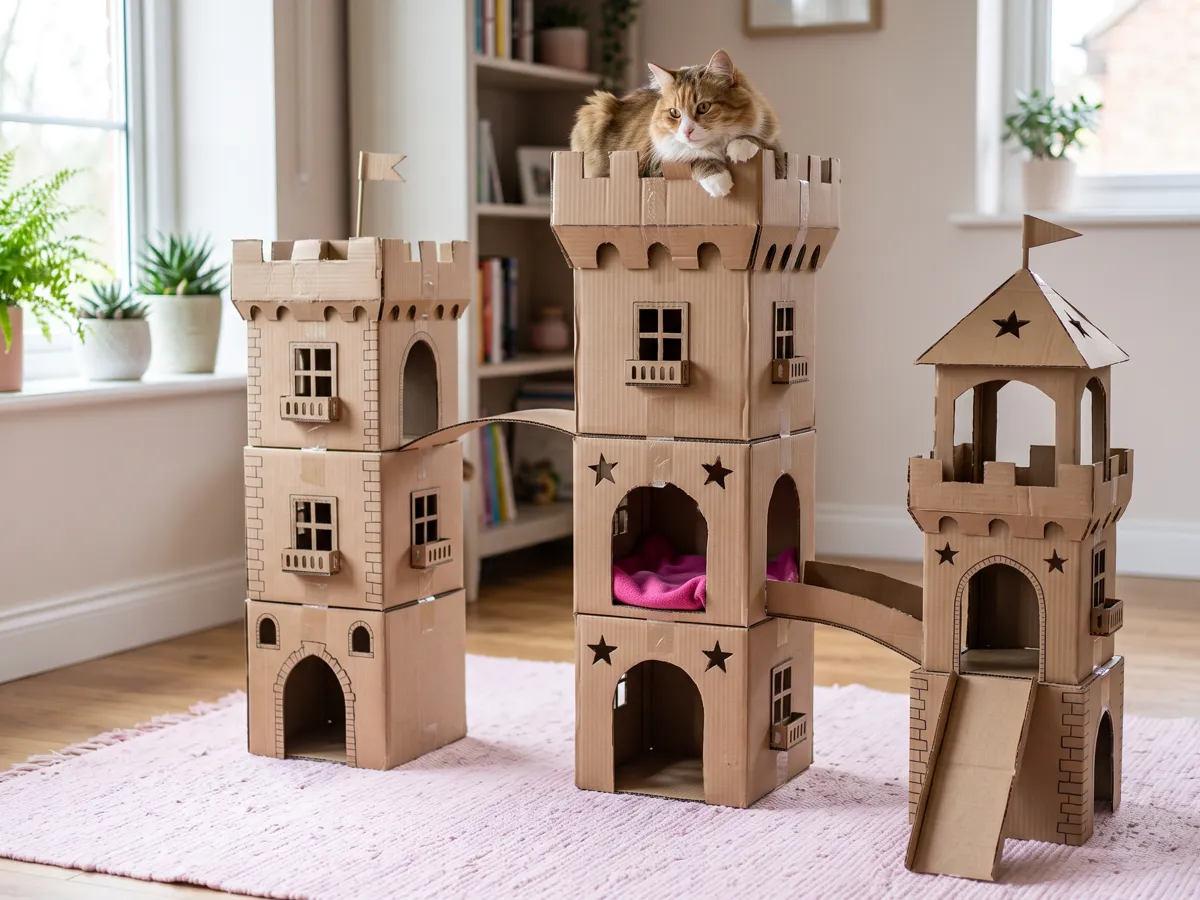
Five cardboard castle builds
| Build | Boxes | Time | Materials |
|---|---|---|---|
| 1. Single-box den | One box, two door cutouts | About 30 minutes | Tape and a blanket |
| 2. Double-box tunnel | Two boxes taped end to end | About 30 minutes | Tape and a peek hole in the middle |
| 3. Stacked duplex | Two boxes with offset doors | About 1-3 hours | Hot glue and tape |
| 4. Corner keep | Three boxes in an L-shape | About 1-3 hours | Hot glue, tape and sisal scraps |
| 5. Weekend palace | Three towers and a bridge plank | About 3 hours | Hot glue, tape and a folded blanket on top |
Build times are the ones in the plans above, and every level gets a weight-test before a cat goes in.
Watch a cardboard build
The five plans above are written out step by step. If you would rather see a cardboard house go together before you start cutting, this video from the channel KmiX follows one cat house built from a shipping box.

A cardboard cat house built from shipping boxes, shown by the channel that made it. Video by KmiX on YouTube.
Weight-test and anchoring
Cardboard holds only if the seams do, so this is the order we run on every build, from the single-box den to the weekend palace.
- Tape and glue every seam while the box is still flat on the floor.
- Weight-test stacked levels with books first, before anything else goes on top.
- Weight-test every level before cats enter.
- Set a corner keep into the wall corner so the L-shape has two walls behind it.
- Top the tallest tower with a folded blanket only after the stack holds.
- Set the finished castle off heaters and away from wet floors.
- Re-test a level after you retire a chewed or soggy panel.
Materials and cost per build
| Material | What it is for | Where to get it | Cost |
|---|---|---|---|
| Shipping boxes | The structure of every build; double-wall corrugate holds more weight | A local shop, a friend's delivery, or your own recycling | $ |
| Packing tape | Holding seams flat while glue sets and reinforcing door edges | Office or shipping supply shelf | $ |
| Hot glue gun | Sisal patches, bridge plank ends and small decorative joins | Craft aisle; low-temperature guns are easier on cardboard | $ |
| Sisal or jute scraps | One scratch surface beside a door per tower | Craft or carpet offcut bin | $ |
| Box cutter | Doors and windows; a blunt blade tears corrugate instead of cutting it | Hardware aisle; use a fresh blade and a steel ruler | $ |
| Books for the weight-test | Loading stacked levels before a cat goes in | Your own shelf | $ |
Cost bands are our own estimate from the materials above: $ under $10, $$ $10-25, $$$ over $25. Prices move by store and season, so treat them as a starting budget rather than a quote.
Materials, measured
| Tool | What it is for | What to look for | What to skip |
|---|---|---|---|
| Box cutter, fresh blade | Scoring doors and windows, and trimming a flap edge square | A retractable cutter with a spare blade kept in the handle | A blade worn past its point, which drags and leaves a furry edge |
| Steel ruler | A straight line for the marker and a rail for the blade | A metal rule long enough to span the face you cut most | A plastic ruler that flexes under the blade |
| Cutting mat | Stopping the flap from sliding and the blade from skating | A mat wider than the biggest panel in the plan | Bare floor under the cardboard |
| Hot glue gun and sticks | Sisal patches, bridge ends and the joins tape cannot hold alone | A low-temperature gun with a fine nozzle | A wide nozzle that floods a seam you meant to keep thin |
| Packing tape and dispenser | Holding seams flat while the glue sets, and wrapping a door edge | Wide tape on a dispenser you can run one-handed | Bargain tape with a dried edge that peels as soon as it is pressed |
| Marker | Numbering panels and drawing the cut line before the box moves | A dark fine tip that shows on brown corrugate | A pale pencil line you lose under the tape |
| Compass or round template | Drawing window circles and door arches that match | A compass that opens wide enough, or a jar lid to trace | Freehand arcs that come out lopsided |
| Dust sheet | Catching shavings and glue strings under the work | An old sheet or a drop cloth you can shake outside | Working straight onto a rug |
Cut list and order of work
The box tells you where to cut if you mark it while it is still assembled. Stand it up, keep the flaps open, and draw the whole cut list on the panels you can see: the door, the windows and every join you plan to tape. Then cut in this order, because a flattened panel springs back and a cut made on it comes out crooked.
- Mark the door on the face that will sit toward the room, not the face that goes against the wall.
- Cut the door first. It is the one opening you will test by hand, and it sets the size the rest of the cuts follow.
- Cut every window and tunnel hole before you flat-pack, so no panel shifts in the middle of a cut.
- Keep the panel you cut most cleanly as a pattern, then trace it for the mirror piece on the second tower.
- Label each panel with a letter in marker, then write that letter on the tape seam it belongs to.
Cut on a mat or a dust sheet, not on the floor.
Glue-up order
Glue is the join that carries the stack, and tape is the clamp that holds it while the glue goes off.
- Dry-fit every joint first, with no glue anywhere. Slide the panels together, check the corners, and mark the ones that need a trim.
- Glue the base to the wall panel. Press the two edges together and hold until the glue grabs.
- Add the shelf next, squared to the base, so the shelf carries into the base joint instead of hanging off one wall.
- Set the roof last. A roof glued onto a finished box sits flat on both walls at once.
- Hold each joint by hand until the glue stops moving, then count to ten before you reach for the tape.
- Tape the outside of every seam while the glue sets. Tape on the inside lifts the first time a cat leans on it.
Tolerance and fit
A build that fits is a build that swings. Before the glue grabs, check three things: the door clears its frame, the corners sit flush, and the box sits level on the floor.
A door needs a gap at each side and a sliver of clearance at the bottom. Open it as far as it goes, let go, and watch what it does. A door that rubs its frame tears at the hinge before any other panel does, so trim the door, never the frame.
Test a joint before the glue grabs: slide the panels together dry, press the corner with one hand, and rock it with two fingers. If the corner moves, the panels are not seated, and glue only locks the gap in place.
A cut that runs 2 mm past the line is not a reason to start a new box. Trim the longer panel to match the shorter one, keep the mismatch on a back face, and tape the joint before the glue goes on.
A wobble is usually one short corner. Fold a piece of scrap card twice, slide it under that corner, and tape it down so it cannot walk out when the cat lands. Recut instead of patching when the error sits on an opening a cat will use, when the corrugate is crushed through the flute, or when two panels no longer meet at a corner. A patch on a face disappears under tape; a patch on an edge is the first place the build gives.
Finishing touches
A build reads as furniture or as a pile of boxes depending on the last twenty minutes. Work through these in order.
- Sand every cut edge until the corrugate stops shedding crumbs. A sanded edge takes tape without lifting.
- Wrap the base in a small mat. It hides the seam where the box meets the floor and catches the shavings that fall out of a new build.
- Fold a flat cushion into the top level and let it sit proud of the edge, the way a seat looks on a bench.
- Tape the raw edge of every window. Fold the strip over the cut, press from both sides, and the edge stops catching on a collar.
- Hide a glued seam with a strip of paper or a length of washi tape, so the join reads as a design line rather than a repair.
- Run a hand around the inside of each opening and turn in anything sharp: staples pushed flat, tape edges folded down, nothing sticky facing the space where the cat turns around.
Cleanup after the build
A cardboard build makes two kinds of mess: shavings on the floor and glue strings everywhere else. Sweep before the finishing pass, not after, because shavings stick to warm glue and are much harder to lift once they do.
Fold the dust sheet into itself when you finish, so the shavings end up inside it. Wipe the ruler and the blade with a dry cloth, cap the marker, and stand the glue gun on its rest to cool before it goes back in the drawer.
Steady it, then let the cat in
A build that has passed the book test can still walk across the floor on the first jump. Settle it before the cat gets a vote.
- Slide the build against a wall. Two sides touching a wall beat any amount of tape on the base, and a corner keep wants the corner anyway.
- Press the top shelf with a flat hand, hard enough to move the whole stack rather than the shelf alone. If the shelf flexes and the walls do not, the shelf glue is the weak joint.
- Introduce the cat with the box empty: no blanket, no toy, nothing inside that smells of the cupboard. Let the cat walk in, turn around, and walk out.
- Add the blanket after the first sniff. A bed that appears on the first day is furniture; one that appears after the cat has claimed the box reads as a nest.
- Leave the build alone for a day. Moving it while the cat is still choosing a door sends the cat back to the floor.
Maintenance and takedown
Cardboard ages faster than the cat does, and most of that ageing shows up in the tape.
- Weekly tape check: walk every seam with a thumb. Tape that has lifted at one corner lifts the rest of the way the next time the cat launches off the roof. Press it back if it is still tacky and replace it if it is not.
- Monthly wobble check: grip the tallest tower at the top and rock it gently. Movement at the base means the base needs fresh tape; movement at a shelf means that seam needs glue.
- Retire a soggy box: a panel that has taken water, from a spill, a plant or a cat, never dries back to its old shape. Retire the panel the day you notice it, and retire the whole build if the base has gone soft.
- Flat-pack and store: cut the tape along one seam, fold the build along the creases it already has, and stack the panels with the pattern panel on the outside. Store the stack dry and off the floor, behind a sofa or on top of a wardrobe.
- Recycle the rest: bare corrugate goes in the paper bin once the tape, the glue lumps and the sisal are off it. Tape and sisal go in the general waste.
Common failures and the fix
Cardboard castles fail in a few predictable places. Each one has a fix that does not need new boxes.
What goes wrong and what to do
| Failure | Why it happens | Fix |
|---|---|---|
| The stack leans or topples | A stacked box sits on soft ground or the seams were taped while the box was standing | Rebuild the level with the box flat on the floor, tape and glue the seams, then re-test with books before a cat goes in |
| Doors tear into flaps | A door cut without a ruler, or corrugate cut against the grain | Cut along a steel ruler, keep doors 6 inches wide or wider, and reinforce a ragged door with a tape frame |
| Sisal patch peels off | Glue applied to the printed, coated side of the cardboard | Glue to the plain brown corrugate side and wrap the sisal once before the glue sets |
| The whole castle smells | A chewed, soggy or urine-marked panel stays in the build | Retire the panel the day you notice it, keep the castle off wet floors and away from heaters, and re-test the level afterwards |
| The cat ignores it | The build has one resting spot, or it sits in a high-traffic hallway | Give the room more than one resting spot and let the cat choose where it sleeps, and move the castle somewhere quieter |
| Tape lifts in humidity | A seam taped on a dry day is the same seam on a wet one, and the adhesive lets go first at the corners | Press the lifted corner back down, or replace that run of tape with fresh tape and press the whole length, not just the corner |
| Shelf sags in the middle | The shelf was taped across its face instead of carried into the base and wall joints | Add a strip of corrugate folded into a triangle under the shelf, taped to both the shelf and the wall behind it |
| Door tears at the hinge | The hinge was cut with no clearance, so the door rubs its own frame every time it swings | Trim the door side until it clears, wrap the cut edge in a tape frame, and re-test the swing before the glue goes back on |
| Glue string on the carpet | A hot glue gun lifted mid-run leaves a thread that lands on the rug under the build | Scrape a hard floor with a plastic scraper, hold a cold pack against a rug bead until it lifts whole, and roll tape over a hand to pick up the strays |
The first rows are the environmental rules on this page applied to a build that is not working: resources in more than one place, and a dry location.
When to skip the build
Five situations where a shipping-box build is the wrong answer, and what to do instead.
- A cat that eats cardboard. If your cat keeps chewing through panels, the build becomes a pile of crumbs. Skip it and choose another kind of hideaway — the cat tree buying guide covers the bought version. Supervise, retire chewed panels, and skip the build if the chewing does not stop.
- A rental with a no-glue rule. Hot glue on a wall leaves a mark you cannot sand out of paint, and tape on wallpaper takes the paper with it. Build freestanding, with the box pressed against a wall and no adhesive on the wall itself.
- A household with a puppy. A box that comes apart under a mouth is a snack and a project at the same time. Keep the boxes off the floor while the puppy is loose, or build one later.
- A build that blocks a walkway. A corridor that a human has to sidestep is a corridor the cat will also be knocked in. Move the plan to a corner, a bay or the foot of a wardrobe.
- A cat that prefers one plain box. Some cats ignore the castle and live in the box it arrived in, and that is the cheapest outcome available. Cut one door, sand one edge, and leave the rest.
Cardboard castle questions
Is chewing cardboard a problem?
Supervise chewing and retire soggy panels. Remove all staples, plastic handles and tape strings before the build goes up, and never let cats eat tape or glue. Castles are consumables, not furniture, so retire chewed panels monthly and keep the whole build off heaters and wet floors.
Can kittens and older cats use the towers?
For kittens and older cats with limited mobility, keep boxes, perches and shelves low or reachable by a ramp. Start with the single-box den, the easiest first build, and add a ramp to any level a cat cannot step into.
Where does the scratching surface go?
Glue sisal scraps beside one door per tower. Scratching areas can be a sisal-covered surface on an elevated perch or a scratching pad, and key resources should be available in multiple locations.
How thick should a box be?
Pick a double-wall box for anything a cat will climb on, and keep the single-wall boxes for the doors, the tunnel and the dress-up panels. If you are not sure which one you have, fold the wall back: the flutes in double-wall corrugate line up in two bands, and a single-wall box has one. Double-wall holds the stack; single-wall is the one that folds under a hand press. For informational purposes, consult your vet.
How do I make a door that swings?
Mark the door on the face that goes toward the room, leave one edge uncut as a hinge, and cut the other three sides along a steel ruler. Give the door a little clearance on each side and at the bottom, so it does not rub its own frame. Wrap the cut edges in a tape frame, and keep the hinge on the side away from the walkway.
Is hot glue strong enough?
Hot glue holds a sisal patch, a bridge end and a door frame, and it is not the join that carries a stacked tower. On any level that takes weight, glue to the plain corrugate side and let tape do the clamping while the glue sets. Weight-test the level with books before a cat goes in, and re-test it after any panel is retired.
How do I stop a cat eating the cardboard?
Take the build apart for a day, then rebuild it and watch what the cat does with the edges. A cat that keeps eating cardboard needs the box removed for good, and a cat that has eaten a panel needs a call to the vet. Retire chewed and soggy panels the day you notice them, and keep tape and glue lumps off the floor.
How do I store a build between seasons?
Cut the tape along one seam, fold the build along the creases it already has, and stack the panels flat with the pattern panel on the outside. Keep the stack dry and off the floor, behind a sofa or on top of a wardrobe. Mark the cut lines on the panels before you fold them, so a rebuild next season is a re-cut rather than a fresh plan.
Build checklist
- Remove all staples, plastic handles and tape strings
- Doors 6+ inches; sand every cut edge
- Weight-test stacked levels with books first
- Sisal scratch patch beside one door per tower
- Supervise chewing; retire soggy panels
- Keep castles off heaters and wet floors
- Low tower or ramp for kittens and older cats
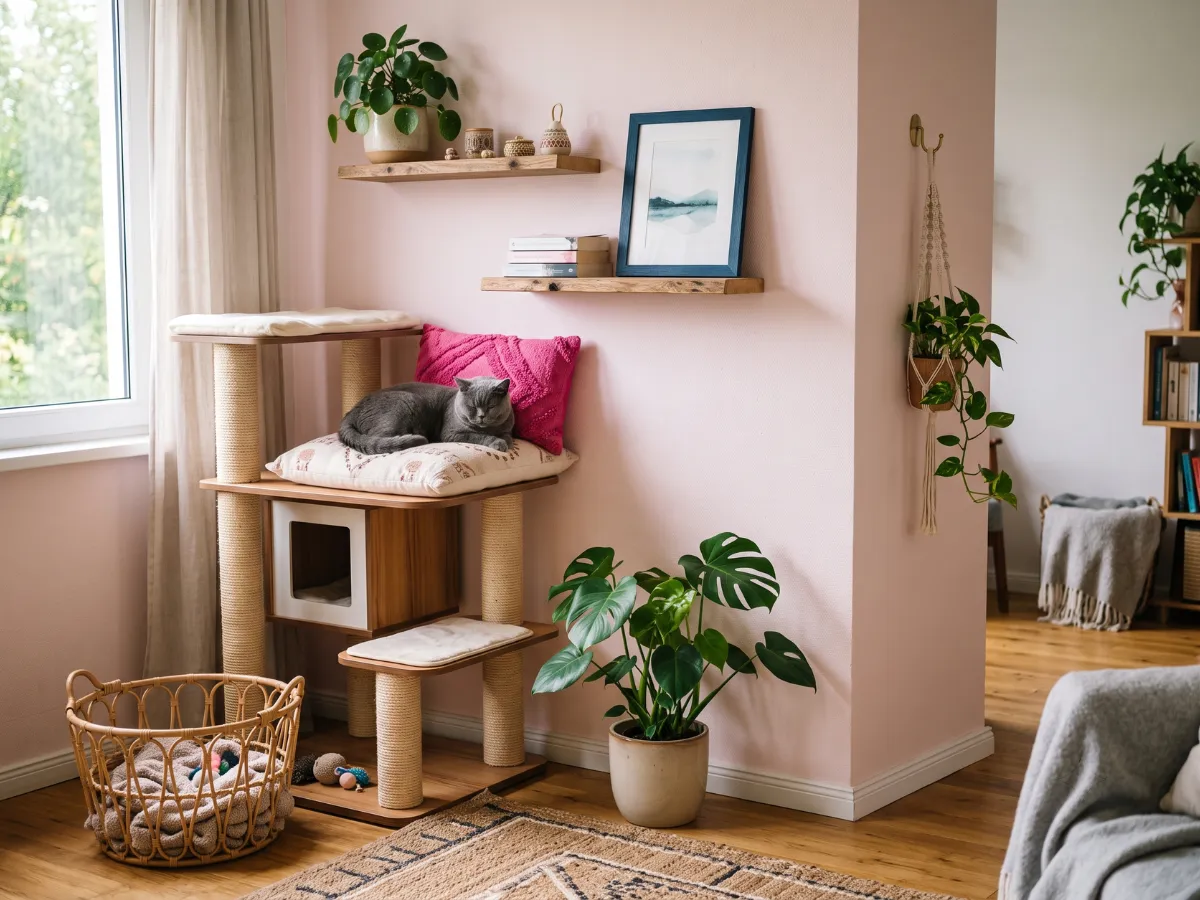
What we use
What we use for cardboard builds
Box cutters, tape, glue and sisal scraps for all 5 castles, in one list.
See what we use →As an Amazon Associate we earn from qualifying purchases.
Save these on Pinterest
Pin the plan that fits your box stash. The Cat Home collection holds the corner and litter guides.
Sources
The perch and placement rules on this page come from feline environmental needs guidelines, not from our own head: